Note: This only works when running the code as a standalone Java application, like you do with unit tests and regular applications.
if you try to do this inside a Java Applet, you will need to fiddle around with SecurityManager.
Accessing Private Fields
To access a private field you will need to call Class.getDeclaredFiled(String name) method
The methods Class.getField(String name) only return public fields.
PS:
by calling Field.setAccessible(true) just turn off the access checks for this particular Field instance, for reflection only. Now you can access it even if it is private/protected or package scope. even if the caller is not part of those scopes But you still can’t access the field using normal code which would be disallowed by compiler.
Accessing Private Methods
To access a private method you will need to call the Class.getDeclaredMethod(String name, Class[] parameterTypes)
The methods Class.getMethod(String name, Class[] parameterTypes) only return public methods
Java files are in src/main/java as well as src/test/java.
Resource files are under src/main/resources and src/test/resources.
mvn archetype:generate: Generates a skeleton of a project based on your inputs (package name, versioning, project name, etc)
Edit pom.xml and set the jdk version there..
mvn package - compile, test, bundle.
JShell
Java REPL(Read Eval Print Loop) import after Java 9
/list -start - shows modules imported at startup.
/edit - edit that line in a new window.
/set editor “vi” - use vi instead of the default graphical edit pad.
/save abc.java - save current buffer to file.
/load abc.java - load from file into shell.
/-1 - execute last snippet.
/1 - execute first snippet.
/drop N - drop Nth snippet.
/vars - show only variables that were defined in snippets.
/types - show only classes that were defined in snippets.
Javap
javap TestDecompile.class - decompile .class file to human readable format. Does not show content of methods though.
javap -c TestDecompile.class - show jvm bytecode in human readable -form, including methods.
Jar Files
These are zip files that have a META-INF folder with a Manifest.mf file inside.
compile and package as a FAT-JAR
<?xml version="1.0" encoding="UTF-8"?>
<build>
   <finalName>indexer-spider</finalName>
   <plugins>
      <plugin>
         <groupId>org.apache.maven.plugins</groupId>
         <artifactId>maven-assembly-plugin</artifactId>
         <version>2.4.1</version>
         <configuration>
            <!--  get all project dependencies  -->
            <descriptorRefs>
               <descriptorRef>jar-with-dependencies</descriptorRef>
            </descriptorRefs>
            <!--  MainClass in mainfest make a executable jar  -->
            <archive>
               <manifest>
                  <mainClass>org.apache.maven.indexer.examples.BasicUsageExample</mainClass>
               </manifest>
            </archive>
         </configuration>
         <executions>
            <execution>
               <id>make-assembly</id>
               <!--  bind to the packaging phase  -->
               <phase>package</phase>
               <goals>
                  <goal>single</goal>
               </goals>
            </execution>
         </executions>
      </plugin>
      <plugin>
         <groupId>org.apache.maven.plugins</groupId>
         <artifactId>maven-compiler-plugin</artifactId>
         <configuration>
            <source>8</source>
            <target>8</target>
         </configuration>
      </plugin>
   </plugins>
</build>
differences between “java -cp” and “java -jar”
There won’t be any difference in terms of performance.
java -cp: must specify the required classes and jar’s in the classpath for running a java class file.
java -jar: jvm finds the class that it needs to run from /META-INF/MANIFEST.MF file inside the jar file
Debugging
jps - Shows all runnning java processes.
jvisualvm - If you have it, it shows the java processes on the system with details on threads, profiler etc.
debugging mode - Use these args to start a process in debugging mode
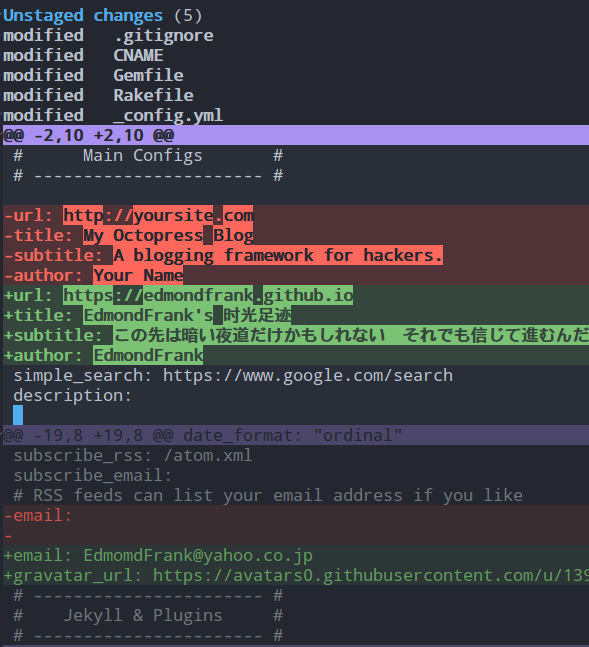
Unstage命令就是Stage命令的反向操作,其对应git reset HEAD [filename],在Magit中Stage/Unstage不仅能够作用于单个文件、所有的changes,还能作用于某个文件的部分区域上;在magit展开文件的diff时,你还发现在文件差异中用@@符号区分的差异区域,在对应的区域内键入Stage/Unstage命令即可仅仅存在该区域中的变更,然后在commit提交时,也可以单单提交这一部分变更
对于Fu 和 Fp来说,upstream是pushremote的上级,这样的场景对应fork分支开发的工作流;
比如User A 有个仓库 Project,User B fork了Project,这样对于User B来说
UserA/Project就是upstream,而pushremote是UserB/Project
另外,在Magit中只有设置了pushremote分支,这样magit status buffer才会显示有哪些变更没有push和pull
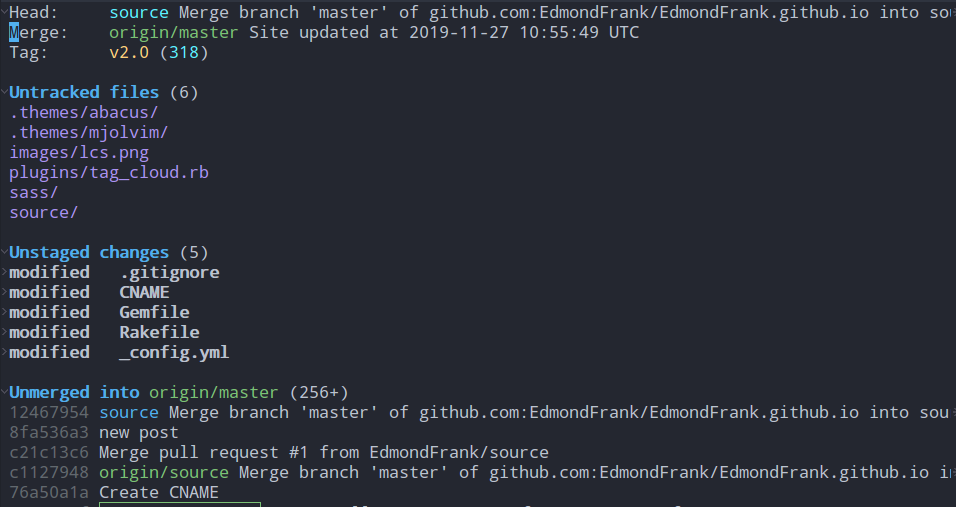 该命令就类似于git status(查看项目的当前状态);但是,在Magit中显示的状态信息会比git status更加丰富
其中包括:HEAD、Tag、未追踪文件、Stash列表、未staged文件、未push文件、最近commit等信息
然后,在相应的条目上回车还可以进行看到更加详细的内容,包括对应文件的修改、具体的commit信息等等
该命令就类似于git status(查看项目的当前状态);但是,在Magit中显示的状态信息会比git status更加丰富
其中包括:HEAD、Tag、未追踪文件、Stash列表、未staged文件、未push文件、最近commit等信息
然后,在相应的条目上回车还可以进行看到更加详细的内容,包括对应文件的修改、具体的commit信息等等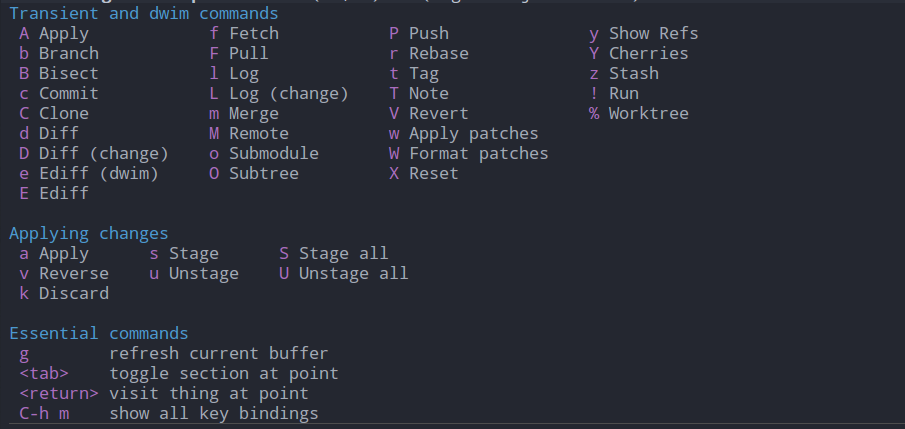 在magit status buffer中键入?可以提示Magit的功能列表以及其相对应的key bindings,新手通过这样一个帮助列表,就可以找到对应的git功能一一操作试试,一段时间后就可以熟悉整个magit的操作了